~pictures for the header and about masak geng are compliments of yuin yi- awesome chef and great photographer~

Friday, November 19, 2010

Thanksgiving Fun

Thanksgiving break is just around the corner, and I'm sure for most of you it has already started! Excited much? =)

Last year I tried to do a Thanksgiving dinner, with a HUGE turkey which turned out a little sad because it was so big that I couldn't fit it in the oven, and had to cut it open before roasting it. Not very pretty.

This year, I'm having some friends over and we'll be cooking and having some Thanksgiving/Christmas dishes and dessert at home! I'm hoping that it'll turn out better than last year.

So people, if you guys are ambitious enough to try out a Thanksgiving dinner, share it here!

Traditional Thanksgiving dishes includes huge roasted turkey, glazed ham, mashed potatoes, green beans, corn on the cob, deviled eggs, mac n cheese, salads (eggs/potato/seafood/etc), pies (pumpkin/apple/mincemeat), apple cider, and eggnog. This year I'm gonna be trying out glazed ham, mashed potatoes, maybe a pumpkin pie, some eggnog.

Good luck to me, and to anyone who's planning on having a Thanksgiving dinner! =D

And have a wonderful and well-deserved Thanksgiving break!!

Saturday, October 23, 2010

Mille Crepe Attempt 1

It was a friend's birthday some three weeks ago, and the usual overambitious, curious me decided to try out the Mille Crepe recipe that I've been eyeing for about a few months now.

When I first discovered this "cake" in a cafe in Melaka, I fell in love with it instantly. It was nothing like I ever tasted, and it's just, amazing. Layers and layers of what I thought to be some kind of egg batter, assembled so perfectly into a cake - it is perfect. So sometime around summer, I was browsing around and looking at baking and cooking blogs, and found the recipe for this mille crepe! It doesn't look as nicely assembled at the one in the cafe in Melaka, but it looks good nonetheless.

So I've been wanting to give it a try, but I've just been procrastinating it for a few months because it really seemed like a lot of work. When my friend's birthday came, it just struck me that I had to give this a try. It was then or never.

Preparing the batter was easy and fun. But the frustration kicks in when it's time to make the crepes. I had access to two non-stick pans, but both had scratches and didn't work very well. My crepes were sticking to the pan and I've wasted about 4 or 5 crepes, and VERY frustrated.

But there's my baker boyfriend, who came and suggested that I use the smaller pan (probably about 4-5 inches) which looked better and didn't have any scratches on it.

It worked, and we ended up having two tiny mille crepe cakes. :D


The sides of the cake wasn't supposed to be covered with cream, but my boyfriend decided to not waste the cream (it was delicious) and just wipe it all over the cake after assembling it, when I wasn't home. *lol*


So it was a pretty interesting experiment, and the crepes turned out thicker than I wanted, but it turned out okay. I will definitely try making it again. :D

Saturday, October 2, 2010

Mooncake

I just realized I haven't update in forever. And honestly, I did not cook anything spectacular. Between my classes and labwork and the mountain load of homework, all i feel like doing each day is to drop dead.

but hey, i'm blessed in that i live with people who loves cooking. who have the patience to try, again and again and again, to make mooncake.

me? i shuffle down every now and then and offer to help coz i felt guilty for being a pig. heh.

so...

i'm taking liberty and posting pictures for you to see. and of course, links to mooncake recipe (i didn't claim that i know how to do it =p) i know mooncake festival is already over... but maybe if you have free time and a craving for mooncake? or maybe for next year?

cheers! pictures and mooncakes are compliments of CJ, and Alicia.

big mound of mooncake
ping pei mooncake
more ping pei mooncake
nice? =)
giant mooncake


links:
Mooncake Recipe (1)
Mooncake Recipe (2)
Mooncake Recipe (3)

Friday, September 24, 2010

Simply Addictive

Since semester started, I have been so super uber busy, I can't even find much time to post something proper here. *sigh*

And because everybody is really busy as well, (I assume - from all the late night facebook updates and complaints on homeworks and lab reports XD) let me at least share something that I personally LOVE, something so simple and easy to make, something REALLY addictive (beware).


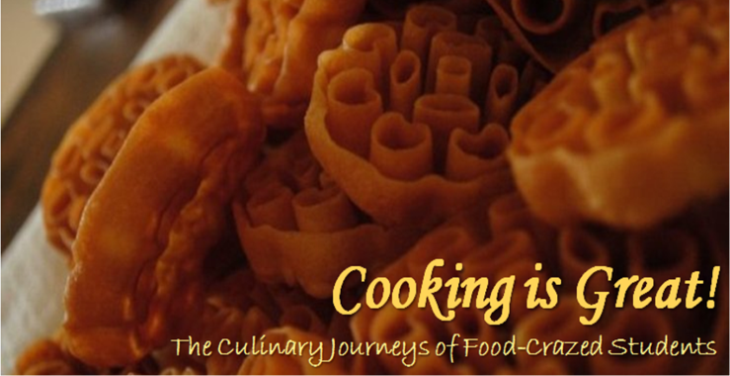
I don't know the original name for it, (does it even have a name?) but let us just call it The Majestic Wonderfully Addictive Spring Roll Snacks! :D Everybody loves something deep fried. Everybody loves something sweet. And most of all everybody goes for anything addictive (despite how unhealthy it is). :D

I think I first learnt about this snack from my mum (or somewhere in the family) when we made it once upon a time for Chinese New Year. When I first made and served it during Chinese New Year that year, I was surprised by how quickly it finished. Everybody loved it and asked me how I made it. The best thing is how simple it really is to make it.

Ingredients:
1.) Spring Roll skin (depending on how much you want to make, but two of this would be enough to start off)

2.) Icing sugar (also depending on how sweet you want it to be)
3.) Oil for deep frying


Method:
1.) Defrost the packet of spring roll skin if it is frozen.
2.) Take a piece of spring roll skin and cut it into half.
3.) Roll it up (as illustrated). If it doesn't stay rolled up, mix some corn starch with water, and apply it at the end of the roll. (acts like glue)
4.) Cut up the roll according to the size you want.

5.) Once you've finished rolling and cutting, heat up oil for deep frying, and fry the spring roll skins until they turn light brown. (it shouldn't take a long time)
6.) Take them up, and sprinkle icing sugar evenly (to taste).


And that's it!

I made this for Raya celebration this year (took me only an hour - and I was in a rush), and everybody loved it! They're even more surprised at how simple it is to make. :) Making this little snack can also be very fun. If you're bored of rolling the skins, try making other shapes! During Chinese New Year this year, my friends got bored and curious, and decided to make origami using the skins. This is how one turned out.

Cute eh? :D

Oh and you can roll it up with seaweed too if you like, as you can see in the picture, if you look carefully. :D

Go ahead and try it! It's addictive I swear! :D

Saturday, September 4, 2010

Old Cucumber Soup!

After so long, I finally persuaded my mum to cook/boil some soup for me. Yeah, we cater so my mum seldom cooks. And the craving for soup comes once in a while. A nice steaming hot soup is excellent for cold weathers! Cream soups are not that suitable for me because well, they're creamy and don't possess that subtle, herby flavour. Not much omph, to shorten words. A chinese will always be chinese. Nothing beats chinese style boiled soup. =D

Old Cucumber is my favourite so I'm sharing this recipe with you guys. =D
Ingredients:
400g of pork bones. *not the full bones of course. have some meat on em'!*
A handful or more of red dates
A handful or more of wolfberries. (kei chi)
A handful of dried longans (this is optional, but it makes the soup sweeter)
A cube of chicken stock
1 old cucumber

Method:
1. Boil the pork till they are half cooked. Leave to cool for later use.
2. Wash the old cucumber then scrape the brown skin of with a knife. Don't peel the skin. Just scrape it off and you'll see a layer of green inside.
3. Cut the old cucumber in half and then into three sections. Or you can cut it in any lengths as you wish. Its really up to you. Remember to remove the seeds! unlike ordinary cucumber, its not necessary to cut off the edge of the cucumber and rub off the sap. My mum laughed at me when I did that. = =
4. Boil a pot of water and put in the half cooked pork bones. let it boil for a few more minutes then add the wolfberries, red dates, and longans. 
5. Cover the pot and let it boil for about ten to fifteen more minutes. 
6. Add the chicken stock cube and cucumber. Stir with a ladle before covering and reducing to a simmer for about 30 minutes. Alternatively, you can use salt and sugar to season the soup. We don't use salt and sugar because we're not that sure of the ratio. Chicken stock works best for us.
7. Place the pot of soup into a warmer and leave it there till its time to serve. You guys probably don't have a warmer so you can let the soup simmer for about 2-3 hours. Is works either way.

tadaaa! a steaming hot bowl of old cucumber soup! excellent for cold days. =)

Sunday, August 29, 2010

Fried Rice

I’m particularly interested in fried rice because there are a hundred ways you can cook it, but very few of them stand out. I still remember this stall outside my tuition centre which sells really good ones – too bad it closed down though.

Serves one hungry person, or two not so hungry persons.


INGREDIENTS (based on feel – vegetable ratios are flexible, sauce ratio is  more important)
One cup of rice – cooked.

Garlic – 2 to 3 pips. More garlic more flavor
Onion – 1/16 or 1/8 of a palm size onion
Carrot – equal to the amount of onions you’re using
Scallions – equal to amount of onions, or depending
Dried shrimps

Oyster sauce – 1 tbsp
Light soy sauce – 1 tbsp
Dark soy sauce – 1tbsp

Black pepper
Curry powder (quite irrelevant)
Chilli powder (quite irrelevant)


INSTRUCTIONS
**HAVE YOU COOKED THE RICE YET??**
1. Fry whatever meat you’re using. I usually use fish fillets.
Tip: Fry fillets with low heat (on a scale of 0 to 7, use 4). It turns brown and crispy, and no pesky oil splattering. Put it aside. You can also fry scrambled eggs – just push them to one side of the pan.

2. Saute the garlic til brown. Fry the onions until they smell. Add in carrots. (Do it in this order). Push everything to one side of the pan.

3. Make sure there’s at least one tbsp of oil. Add in the rice, the 3 sauces, and cover (literally) the whole thing with black pepper (and the other 2 powders). Before stirring the rice, heat up the oil again – the frying sound.

Note: Fry only the rice – keep the spices and eggs separate. Make swift choppy motions.

4. Now, mix everything up. Add in the scallions and dried shrimp and continue mixing.  You’re done :)

IMG_0682

I think the only thing about this is the amount of black pepper and the sauce combination. Well, it keeps me happy during exam period. lol


IMG_0679

Note for beginners: Don’t be afraid of using oil. Embrace it. Rice cannot fry without oil. Learn with trial and error to gauge your oil usage. LOL

Let me know how it works out for you :D

CedZH

Sweet Sour Fish

*recipe from home :D

INGREDIENTS

One onion -  slice into rings or half rings
One tomato- cut into wedges
One third Carrot- cut into strips
One third Cucumber - remove skin - Cut into half and then quarter  lengthwise, remove the centre(seeds)- cut into strips like carrot
[I usually don’t bother adding it lol]

2 dessertspoons Tomato sauce
1 dessertspoon chilli sauce
1 teaspoon oyster sauce(optional)
A slice of lemon or one lime- squeeze the juice( can use  vinegar instead)
One tablespoon Tapioca or corn flour mix with water

INSTRUCTIONS

Heat up the wok
Add enough oil for frying the fish
Fry fish until golden brown on both sides
Remove from the wok.
Turn off the flame.
Remove some oil from the wok after frying the fish.
Leave enough for preparing the sauce.
Turn on the flame.
Saute the garlic till light brown
Add in the onion, carrot and tomato, Stir fry. add tomato sauce and chilli sauce( and oyster sauce)
Add in salt to taste. Add water to slightly cover the whole mixture
Add a bit of sugar
Add lemon or lime juice( or vinegar)
Add in the cucumber, continue stirring
Thicken gravy with starch solution.(Just enough so that the gravy can still flow when u test with spoon)
Dish up gravy and put on top of the fish.

It’s a sweet and sour dish, so it’s really nice if served with oranges. (especially Florida oranges, heavenly). Balance it out with cool vegetables.

IMG_0338

Have fun~

CedZH

Nasi Lemma

This is not cooked by me, but it's awesome so I must post it here.

Ta-daa! Nasi lemak cooked by Foong Yi Chia! It has inspired CJ to try to cook nasi lemak too! =p


rice cooked with santan accompanied by cucumber and boiled egg and fried anchovies

yummy spicy sambal made from ginger, onion, tomato paste, dried chili powder and other stuff i forgot to take note of =p


At any rate, awesome Malaysian fare ^^ Thanks to Foong Yi for yummylicious cooking~!


p/s- the name "nasi lemma" was written in a bubble next to a dinosaur someone drew on foong yi's whiteboard. it's a t-rex saying "i'ma eat nasi lemma!" XD

Saturday, August 28, 2010

It's all very corny.

Fall semester started and I haven't really found many chances to cook something good and nice.

Just as an update, I'm promoting.. CORNS today! Do you all know that Illinois is famous for.. corns? XD When I decided that I'm going to study in the U of I, I've accepted and resigned to the fate that I would be surrounded by corns and corns and more corns.

Clearly, I was mistaken. :) There are plenty of cornfields around, but we do have malls and cinemas and plenty (*cough*) of stuff to do around here besides eating corns. XD

But! I've always been a fan of corns and today, I've fallen even deeper in love with the sweet corn in Illinois.


THIS. This is the BEST thing on earth.

Me and several other Malaysian peeps went for this Sweet Corn Festival today (because I thought it would be interesting to see what they have to offer, and being in Illinois, how can I not see a Corn Festival?) and they were selling two of this for 1 USD! Is that cheap or what!

The first bite brought me to heaven. Haha! But really, it was heavenly. It was literally dripping with butter, but it was good. It was so sweet that I wouldn't have it with salt and pepper at all. It was very very juicy too! This is really the best corn I have ever tasted. :D

We had at least two each. Our MaSA president decided to have 4. Shows just how incredibly good it is. :)

So next time you come to Illinois, remember to buy back some of our sweet corn! It's definitely one thing not to be missed!


I am CORNY!


Saturday, August 14, 2010

Yummy Pai Kuat (Pork Ribs)

I remembered this dish as me and my sister's favourite dish among all other yummy dishes cooked by our grandma.
Now, she'll probably remember it or not. I actually forgot how to cook it after about 8 months and i decided to refresh my memory again by asking my grandma how to make it.
And I am proud to say, Jia Ling has mastered it!!! XD XD
This is a really really nice dish to be served with rice for you Malaysian students in US or any where else in the world. You won't need supper! =D

First, you will need:
1 kg/ 2.2 pounds pork ribs/pai kuat.
7-8 tablespoon black bean paste (more or less depending on size of meat)
Two cucumbers
1 lime or 2-3 kat chai
Sugar
Salt

Method:
1. Cut the cucumber into thin slices and add about 3 tablespoon of salt. Mix the cucumber with the salt and leave for about 30-40 minutes.
2. Squeeze out the salt water from the cucumber slices. Then, rinse them with water to remove the excess salt. We don't want them to be overly salty!
3. Add about 2-3 teaspoon of sugar and mix with the cucumber slices.Leave aside for later.
4. Half cook the pork ribs in water so that they are easier to cook later. Drain the water and leave the meat to cool.
5. Heat some oil in a pot and put the pork ribs in. Stir in the black bean paste and fry till all the pieces of meat are coated with the sauce. Add more sauce if the meat pieces are not fully coated.

coat em' like this =)
6. Add sufficient water to cover all the meat in the pot. Make sure the water really covers all the meat so that they can be cooked till tender and soft.
7. Cover the pot and leave the stew to cook over low fire for about two hours or till the meat are soft and tender.
8. Once at least 3/4 of water is evaporated, the sauce will be thick and the meat will be soft and tender. Squeeze the lime or kat chai into the stew and stir well.
9. Scatter the cucumber slices generously over a plate and pour in the stew.

Ze' end result
Voila! Yummy sweet and sour pork ribs.
Good Luck!
Satisfaction guaranteed. =D

Thursday, August 12, 2010

Crème brûlée

Crème brûlée is French for "burnt cream", a dessert made of rich custard and topped with caramel, and it is the best thing I have ever tasted. I fell in love with it the first time I had it in a restaurant by the Melaka River, but I've forgotten about it until I had it again in a Korean restaurant in Champaign-Urbana. It has been one of the things in my "to cook" list since then.

So, while I am still in holidays with nothing else to do and I am desperately in need of something to occupy my mind with, I've decided to try making this heavenly dessert.

With this recipe I found on this website called "Cooking for Engineers" (wow), which I think gives very very good instructions (with pictures too!), I set off to Walmart to get a lot of eggs, cream, and Ramekins (which aren't cheap). Oh and the blowtorch (ALSO expensive, and requires you to be 18 to buy it, so make sure you bring an ID along with you if you are thinking of getting one).

With that,

I get my Crème Brûlée! :D

As I was too eager to taste it, I did not refrigerate it as long as it says in the recipe, but another recipe that I just randomly looked up online says that refrigerating it for 2 hours is enough, as long as it is completely cooled. My Crème Brûlée tasted pretty okay, a little too sweet maybe, and I think it was a little not done (as I used Ramekins of a different size, so I guess the baking time differs as well?).
Oh and I had help with the blowtorch (haha). :P Credits to Andrew Chu for doing the burning thing for me. :P

I would say it was quite a success, but I will definitely try again and improve it! :D

YAY!

Wednesday, August 4, 2010

tomatoes!

i am very excited to find out that cj yang has taken a nice picture of his garden harvest! it's so pretty! he also planted squash, but i think most people won't go around buying squash. or will you? hmmm...


home grown tomatoes!!!


so when we have about a gazillion tomatoes on our hands, we give them to neighbors, and try to finish them before they rot (and we actually succeeded!)

this is one of my favorite tomato dish: lasagna XD


now please forgive how much this slice of lasagna look like it's about to collapse: i didn't give it enough time to cool before putting it on my plate (i was hungry and it was 2pm) so the cheese didn't solidify enough yet and hold the meat together neatly =(


but it tastes pretty good. a little like spaghetti too actually =)

this is the recipe based on what i cooked last sunday, but you can substitute as you see fit. i've done pure beef lasagna, beef+pork lasagna, pork+turkey lasagna, pork+chicken lasagna... it doesn't matter lol. whether you want veg or not, more tomatoes or less, more flavor or less, you can modify to fit your tastes.

(extremely modified) lasagna recipe

Servings: four to six, depending on how much you eat.
Baking tray size: approximately 8in by 8in

ingredients:

7 lasagna noodles
500 - 600 lbs of meat, minced
10 - 15 tablespoons of tomato based pasta sauce
4-6 tablespoons of tomato sauce
4 shitake mushrooms, sliced
1/4 cup of peas
1/3 cup onions, diced
10 mini tomatoes (see pic above), quartered
or 1 tomato on vine (giant size), sliced thinly
or 2 small roma tomatoes, sliced into eight pieces
1-2 cloves of garlic, minced
~6 slices of cheddar cheese
or rough equivalent in quantity of other type of shredded/bar cheese
cooking oil
salt and sugar to taste
(optional) 1 tsp oregano
(optional) 1 tsp chili powder
(optional) 1 tsp black pepper


1) (Optional) After mincing meat, mix with 1 tsp of oregano, chili powder, black pepper and some salt to marinate for about 10-15 minutes.
2)Boil the lasagna noodles with a little salt for about 10-15 minutes, or until tender. Drain and set aside.
3) Saute minced garlic until slightly brown before adding onions and minced meat. Fry until the meat looks thoroughly cooked.
4) Add the pasta and tomato sauce until sauce is enough to cover the meat. Make sure that it is not too watery (else the lasagna won't hold properly)
5) Add mushrooms and peas, and about half of the quartered tomatoes. Stir fry for about 1-2 minutes more.
6) Add a pinch of salt and sugar. If the pasta/tomato sauce is sour, you might need to add a bit more salt and sugar to balance it out. Set aside.
7) Grease your baking tray with oil or butter. Lay three lasagna noodle down as base. "Frame" the pan: Let the ends of the lasagna noodles lie on the side of the pan.
8) Cut each cheese slice into 12 pieces. Place them along the "seams" where the noodles meet.
9) Layer the noodles with approximately half the fried meat/vege combo.
10) Place half of the uncooked quartered tomatoes on the meat. Layer with more cheese if desired (recommended)
11) Cut the remaining noodles to fit the size of the pan. (Most noodles are longer than 8in). Save the "prettier" pieces for the top. Use the others as the second layer.
12) Again, place the cut cheese slices along the "seams" where the second layer of noodles meet.
13) Layer with the remaining fried meat-vege, decorate with the rest of the tomatoes, and layer with more cheese (must do if you want the upper layer to stick)
14) Layer with the last of the lasagna noodles. Sprinkle shredded cheese on the top as decoration if desired.
15) Cover with aluminum foil and bake in a preheated oven for 30 minutes at 375 F.
16) Remove aluminum foil and continue baking for another 10 minutes (or until it turns slightly golden brown. Do not overbake -> the noodles will turn really hard)
17) Let cool for 5-10 minutes before serving, so that the cheese will solidify again and make sure your lasagna doesn't fall apart.


actually, it's a real simple dish in the sense that you can modify it however you like. the original recipe i obtained needed cottage cheese (i really dislike the taste lol) and it didn't have any vege in it, and it required more spices that my kitchen holds, so i modified according to what i have on hand (that's how i ended up mixing two kinds of meat in one lasagna. they taste good nonetheless. and i didn't get stomachache) if you do try to make this with two types of meat, i would recommend frying them separately and then putting them on different layers.

i love making this on sundays because then i will have leftovers to pack as lunch on monday =p microwave it for 1-2 minutes after it is defrosted, and voila! lunch~!

toodles for now! i can't believe i wrote a whole (albeit slightly incoherent) recipe just because i wanted to show off the home-grown tomatoes (shakes head). ja' ne~!

Tuesday, August 3, 2010

A Nice, Simple Meal to Share


Kroger's best sauce for cooking, at least to me, is the Bourbon Peppercorn Sauce. And, more importantly, it makes a good dish with chickens and porks! But, wait, I am not the one who cooked this yummy dish. You will have to ask our great chef Jia Mun for her secret behind this tasty dish! :)

By the way, I still think that the sausage looks like fake carrots, just like fake chicken in a vegetarian menu. :P

Sunday, August 1, 2010

Pan-Fried Shrimp

Sorry I've been on such a cooking spree lately. :P Blame it on me who bought too much groceries and food and now I realize I need to finish cooking and eating all those in a week's time, since I'm leaving Champaign Urbana for two weeks on Saturday! :P

When I was shopping for supplies for the Ipoh Bean Sprout Chicken last Friday, I found these fresh (I'm not sure exactly how fresh but it's better than the frozen ones in American supermarkets) shrimps and immediately sapu everything. :P I'm a shrimp lover. XD

I now have some butterfly pork chop pieces, chicken breasts, two pieces of fish, and some more shrimps that I have to finish within a week. Ouch.

Anyway after being so deprived from shrimps for the past year, I happily looked up recipes for shrimps online, and as usual, Rasa Malaysia was my first stop, and I found this. I have to admit, Rasa Malaysia almost never failed me. ;)

And so,


My Pan-Fried Shrimp! :D


I kinda altered the recipe a little (as usual) but it still worked! Whee~

Go try out the recipe, people! It's really easy. :)


And hopefully no more after this! Must study for finals! Good luck to me!

Saturday, July 31, 2010

Min Fan Gou 面粉糕

My very first post here! :D

So, after being very inspired from the success of my Ipoh Bean Sprout Chicken yesterday, I've decided to try out Min Fan Gou or 面粉糕 (Mien Fen Gao in Mandarin). I remember when I was young, my mum used to make it for us during Sundays when she had more time to cook, and it would be my least favourite dish. It was just pieces of flour in soup to me. Then as I grew older and my mum's no longer here to make Min Fan Gou for us, I started to crave for it. See, you'll only start treasuring things when they aren't easily available to you. And there's this one stall near my high school which sold REALLY good dried Min Fan Gou (with sambal) and I grew to love it. The thing about this dish though, is that it's really troublesome. There's some kneading to do, anchovies frying, and soup preparing. So I don't really make this a lot, unless I suddenly get inspired and you know, being the random me, decides to be completely random. :D

So last week, a friend told me he really wanted "that thing that's similar to Pan Mee" which I figured out is Min Fan Gou lol, and since I'm still in good mood for cooking, I've decided to make one today.

Therefore...


Tadaaaaaaaaaaaaaaa! :D

The ONE thing missing in my Min Fan Gou is chillies in soy sauce. That's the one thing that I MUST have with Min Fan Gou back in Malaysia. Too bad I can't find any fresh red chillies here. >.<

As usual, I don't really follow any recipes for dishes that I've learnt from my mum. I just like to experiment. :D But for a recipe, check this out. (Note: Usually, wheat flour is used, but I don't have any for the moment, I used all purpose flour instead, which worked out pretty well too. :))


Signing out,
Full and happy bimbo.

Cooking is Great!

Welcome to the blog for Cooking is Great!

When a group of students with a passion for eating good, mouthwatering Malaysian delicacies end up in the land of cheeseburgers and fries (and no char koay teow sighs) ~ desperation (or in some case, a passion of cooking) drives us to start cooking all our favourite food! Here, we can now pool our resources, show off awesome photos of food for others to salivate after, as well as trade recipes (or tell others that your recipe is top secret and patented XD). There's also avenue to earn some money by cooking for others... but remember shipping fee is $25.00 for USPS Next Day Express and quality is not guaranteed to be the same after traveling for one day =p

Anyone interested in contributing to this blog, please contact CJ, the founder of Masak Geng. Come join! The more the merrier... and the more food choices we will have to cook!

Photos for the header and the description of Masak Geng is compliments of Yuin Yi, our Masak Geng head chef =)


ipoh chicken rice with bean sprout by yuin yi
ayam masak merah by cedric
chee cheong fun by chin jian


Bon appetit!

P/S: join our Facebook page -> Cooking is Great!